Linuxstamp II 9260
Contents
Description
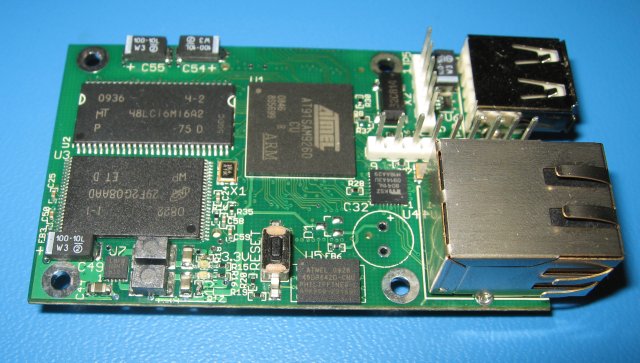
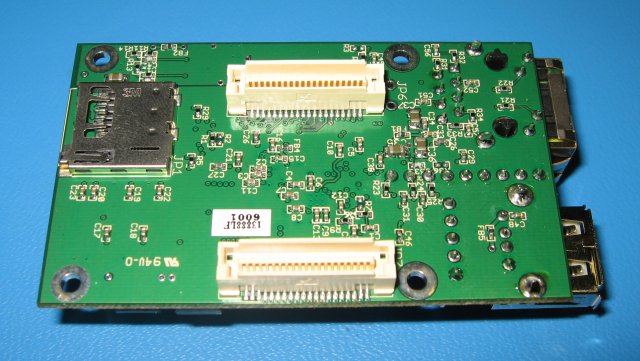
The Linuxstamp is designed to be a general purpose processor module. It is designed to work as a stand alone module (micro-SD card, Ethernet and USB/Serial converter are all on the module). This allows all initial development to be done without a motherboard, but for integration into a specific project a motherboard with specific features could be designed.
Status
You can now purchase Linuxstamp II boards from thelinuxstamp.com. Some of the original Linuxstamp info is still useful.
Features
- Atmel AT91SAM9260 processor (Arm9 processor with MMU, 200Mhz operation)
- 32MB SDRAM
- 256MB NAND Flash
- 1x 10/100 Ethernet
- 1x USB host port (allows wifi adapters, flash drives and other USB devices to be used)
- 1x micro-SD card slot
- Serial debug port 5-pin header
- JTAG port
Emdebian
The current Linux distribution is Emdebian. It is located in the NAND flash and uses UBI & UBIFS.
Cross Compiler
you can use crosstoll-ng to generate a cross compiler. The documentation on the website is very good.
U-boot
First we need u-boot. If you have not yet built a cross compilier now would be a good time to do so (See the cross compilier section above). Now you can do a test for the Atmel at91sam9g20 EL board using NAND.
- $ make at91sam9g20ek_nandflash_config
- $ make CROSS_COMPILE=your_cross_compiler
This should give you a "u-boot.bin" file. We will have to write a board specific configuration file for the Linuxstamp. We should be able to base it off the the Atmel DK board. If you look at "/u-boot-1.1.6/include/configs/at91rm9200dk.h" you can see the configuration for the DK board.
Other u-boot commands:
- > printenv, prints the enviroment variables
- > saveenv, saves the enviroment variables
- > setenv bootcmd 'tftpboot 20800000 uImage; bootm 20800000' Sets the boot command to load a image over tftp and boot it
- > setenv bootargs mem=32M nfsroot=192.168.0.3:/nfs_root ip=192.168.0.51 console=ttyS0,115200n8 rootdelay=1
This sets the command line to be passed to the kernel. As you can see it sets the nfsrot, ip address and console
License
All files for this project are licensed under the GNU GPL V2
Hardware design files
Warning!!! Use this design at your own risk. Errata: a 10k pull-up resistor is needed on the CMD line to use the uSD card. Here are the design files You can view the pdf of the schematic here
Power
The power supply for the board is based on the Linear LTC3407-3. This is a very compact high frequency switching power supply. It has both a 3.3v and a 1.8v output. It does have a very tight input range 3.3v-5.5v. The Micrel PHY also needs 2.5v, but this is provided by an internal regulator. Currently a regulated 5v must be used to power the board.
Minicom & the debug port
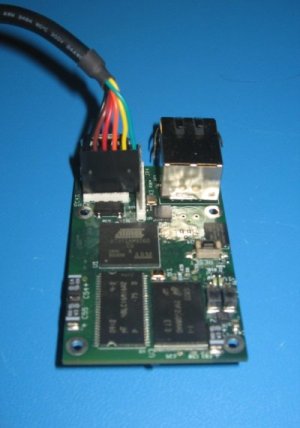
Above shows the proper connection of the ftdi cable to the Linuxstamp II. This provides both the debug console as well as power to the board. Pin 6 (green wire) on the cable overhangs the 5-pin connector on the board.
When you plug the Linuxstamp into your host (Linux) machine a device should appear /dev/ttyUSB0 (the suffix number will increment as you add more devices). /dev/ttyUSB0 will behave as any other serial port now. Minicom is the standard program to access the serial port in Linux. The first time you run minicom you will have to be root in order to do the setup, after that you can change the permissions on /dev/ttyUSB0 so any user can run minicom. To enter configuration mode in minicom type CTRL-A o, now scroll down to Serial port setup. Use the letters to navigate. You will want the device to be /dev/ttyUSB0 and Bps/Par/Bits to read 115200 8N1. Both hardware and software flow control should be OFF. Connection to the board is important for loading Atmel's tiny program and u-boot, but once the board is working it might not be as important.
Another alternative is to use HyperTerm on Windows, which works fine with the Hardware boot loader. If you are updating the Darren Bootloader, note that the loader only has a short delay after you initiate the "receive" (on the loader) after which it send out the "ready to receive" signal. As a result, you'll need to be rather quick to initiate the Xmodem "send" (on HyperTerm). If you are seeing time outs on HyperTerm when you try and send the loader.bin file, you are probably hitting this problem ... you need to have initiated the send before you see the "C" on the screen from the bootloader.
nfs & tftp
Nfs (network file system) and tftp (trivial file transfer protocol) are two servers you will want running on your host machine. Nfs is useful for hosting the root file system of the Linuxstamp. Tftp is useful for u-boot to retrieve the kernel from. There are many other websites on nfs and tftp, but I will try and go over a simple setup. I would suggest being behind a firewall before trying either of these setups as neither is secure. I wrote this using a Fedora 7 system. First make sure you have nfs installed.
$ yum install nfs-utils nfs-utils-lib portmap system-config-nfs
On Ubuntu (or other debian-style systems) you could use:
$ sudo apt-get install portmap nfs-kernel-server nfs-common
Now to make sure the service is enabled run (this won't work on Ubuntu):
$ serviceconf and make sure nfs and nfs lock are checked
Now edit /etc/exports you should add a line like this /path_to_nfs_root/ *(rw,no_root_squash,insecure). Now restart nfs.
$ sudo /etc/init.d/nfs restart
You can test that it is set up correctly by typing the following on the local system (i.e. right on the NFS server)
$ showmount -e localhost
You can test this from a remote system with
$ mount -t nfs server_name:/path_to_nfs_root /path_to_test_mount
Now on to tftp. Make sure it is installed.
$ yum install tftp-server
This will create a file /etc/xinetd.d/tftp. In this file you will want to change disable from yes to no. Now make a test file.
$ cd /tftpboot
$ echo hello > file
Now we can test it
$ tftp -v server_name -c get tmp
Now with u-boot we can load image files
> tftpboot 20800000 uImage
And boot them
> bootm 20800000
NAND Flash
One good solution for the NAND flash is to use the new ubi and ubifs components. These both need to be enabled in the kernel, and then they can be used from the emdebian system. You can always check what mtd devices are avaliable in /proc/mtd. First we can format the mtd device:
$ ubiformat /dev/mtd1
Now we can "attach" it. This is telling the kernel to use the ubi subsystem for that partition. The -m 1 says use /dev/mtd1.
$ ubiattach /dev/ubi_ctrl -m 1
Now we can make a volume. As it says on the linux-mtd page you can only mount a ubi volume not a mtd device or a ubi device:
$ ubimkvol /dev/ubi0 -N rootfs -s 244MiB
Now the volume can be mounted
$ mount -t ubifs ubi0_0 /mnt/tmp/
Links
- [1]: Up to date kernel patch for the AT91 parts
- Cadsoft.de: Free (as in beer) tools for schematic and PCB design
- openhardware.wordpress.com: Here is my openhardware blog
- Mborad 1 for the Linuxstamp
- ECB AT91 This is another open source project similar to the Linuxstamp. They have some very good documentation.
- Budgetdedicated Graciously hosts our ftp site
Discussion
Please join the google group for the Linuxstamp discussion http://groups.google.com/group/linuxstamp
Contact
For further questions or comments please contact Paul (pthomas8589 _at_ gmail _dot_ com)


