SmartPlug GUI Images
Contents
General
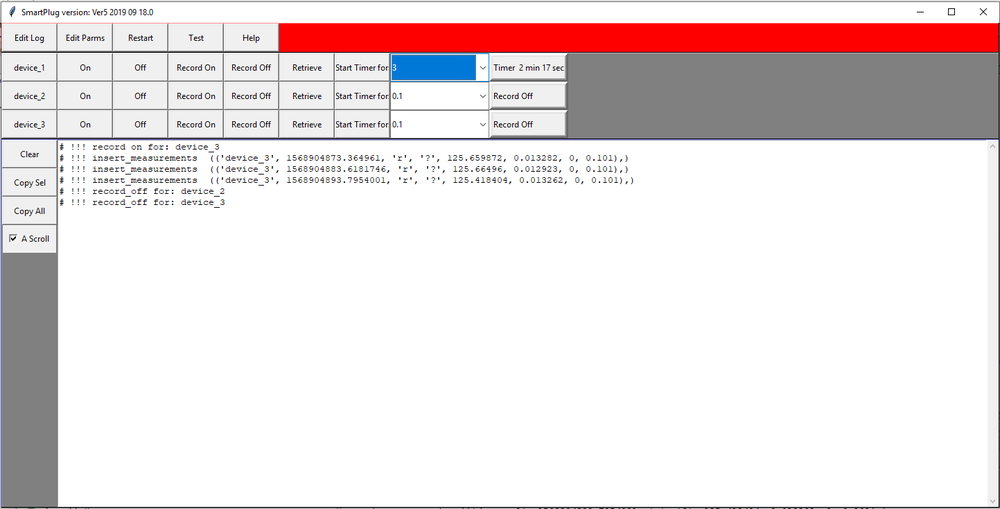
SmartPlug GUI
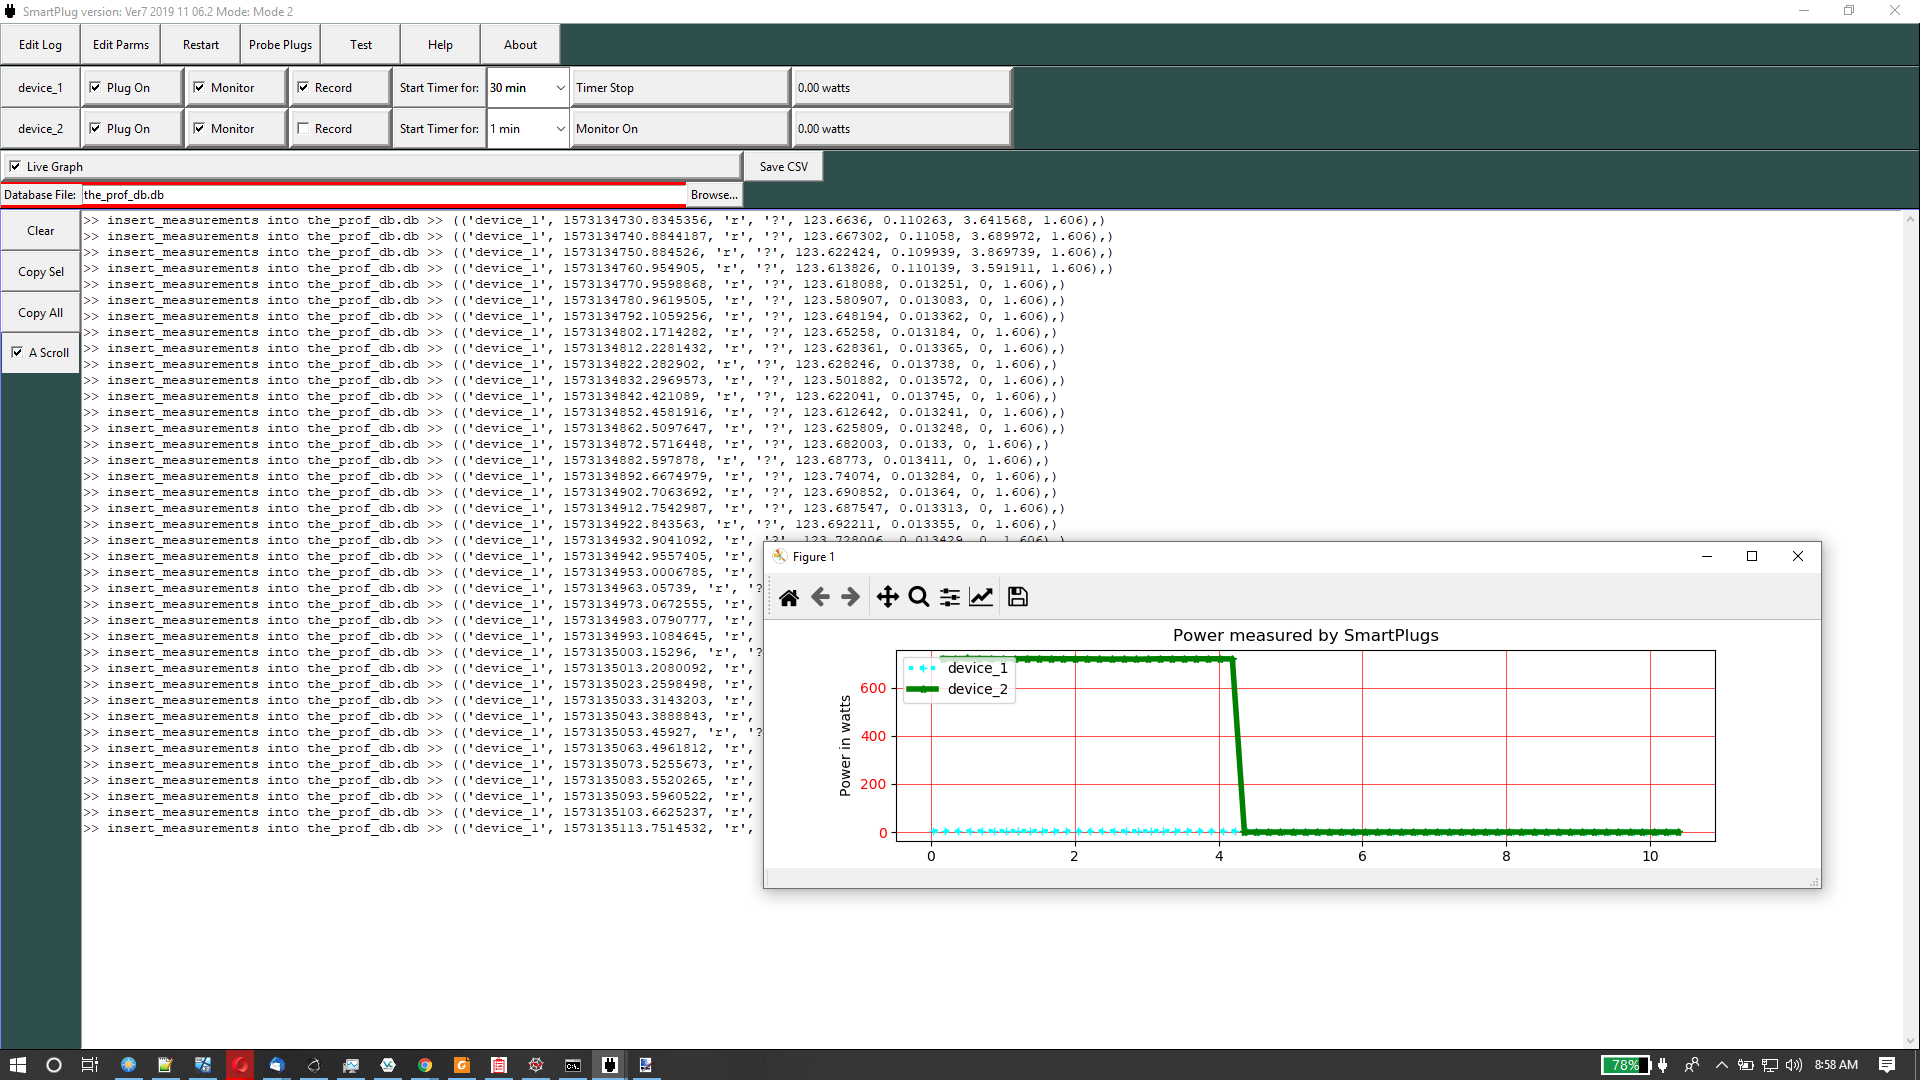
This is the GUI for the project Python Control of Smart Plugs: details on each part below. Still working on it, mostly to clean up the details. Note that this screen shot was taken during a debugging session and has some artifacts that will soon disappear, features that will be improved, then a new screen shot should be placed here.
Keeping screen shots up to date is a pain, these may lag the actual application which should look and perform better as time goes by.
System Widgets
These widgets are present both the SmartPlug and the SmartPlug Graph application. They are related to managing the application, not to the purpose of the application.
- <Edit Log> >Open the application python log file using the system editor specified in parameters.py file. Note: The edit functions work only after you have configured parameters.py for your systems text editor
- <Edit Parms> >Open the application parameters.py file using the system editor, after the file has been modified. The system can be quickly restarted using the Restart button.
- <Restart> >Quickly restarts the system after the parameters.py file is changed or any time you want to restart the system from its current defaults
- <Help> >Open help file ( which mostly links to this wiki ?? )
Applcation Widgets
- <Device button>
- <On>
- <Off>
- <Record On>
- <Record Off>
- <Retrieve>
- <Start Timer>
Message Area Widgets
The message area is the large white area at the bottom left of the window. It is a scrolling text area. It is present in both applications.
- <Clear>
- <Copy Sel>
- <Copy All>
- A Scroll checkbox
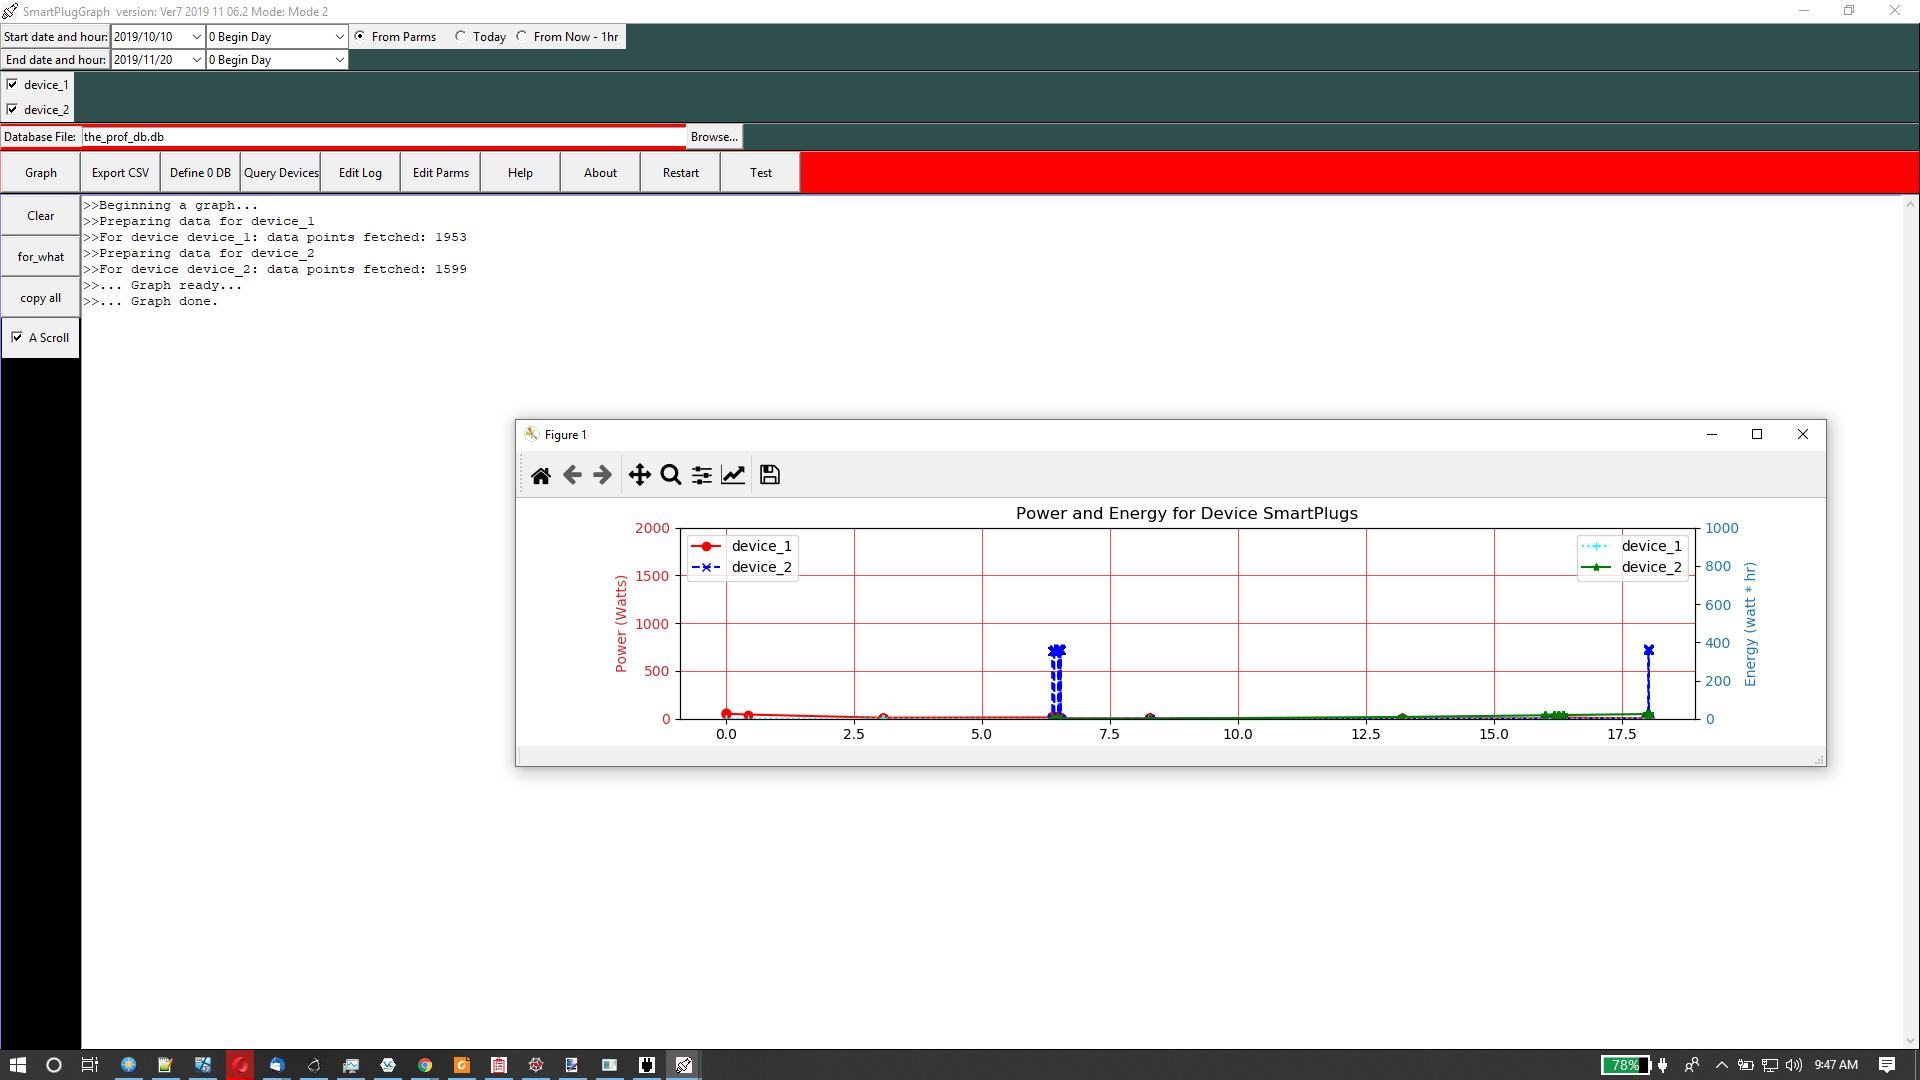
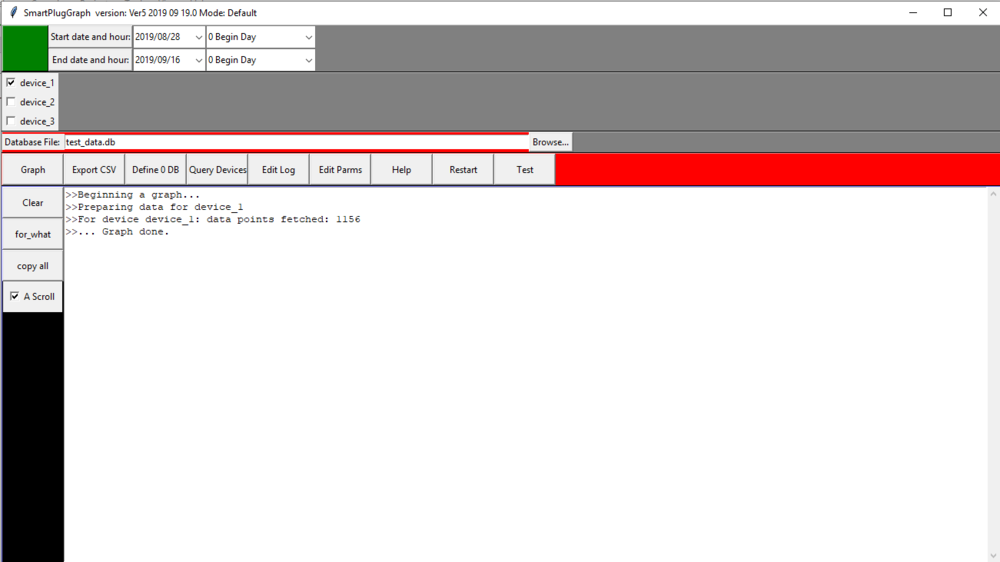
SmartPlug Graph GUI
Note that this screen shot was taken during a debugging session and has some artifacts that will soon disappear, then a new screen shot should be placed here.
System Buttons
These buttons are also present both the SmartPlug and the SmartPlug Graph application.
- <Edit Log> >Open the application python log file using the system editor specified in parameters.py file. Note: The edit functions work only after you have configured parameters.py for your systems text editor
- <Edit Parms> >Open the application parameters.py file using the system editor, after the file has been modified. The system can be quickly restarted using the Restart button.
- <Restart> >Quickly restarts the system after the parameters.py file is changed or any time you want to restart the system from its current defaults
- <Help> >Open help file ( which mostly links to this wiki ?? )
Graph Control
- Next to Start date and hour: set date and hour to begin the selection of data for the graph ( default at startup set in parameters.py )
- Next to Start date and hour: set date and hour to end the selection of data ( default at startup set in parameters.py )
- Use check box to choose devices for data selection. Each device is graphed separately but on the same graph. ( list of devices defaulted in parameters.py )
- Database file selected in space to right of label. Use <Browse> button to select file from your file system. ( default at startup set in parameters.py )
- <Graph> button: create graph in new window -- there are additional controls on that window, see documentation below.
CSV
- Data selection same as for the graph ( output file name set in parameters.py )
- <CSV > button: create csv file from selected data.
Database
- Database file: as above ( name a new file when creating an empty database )
- <Define 0 DB>: create an empty, new database
SmartPlug Recording Graph
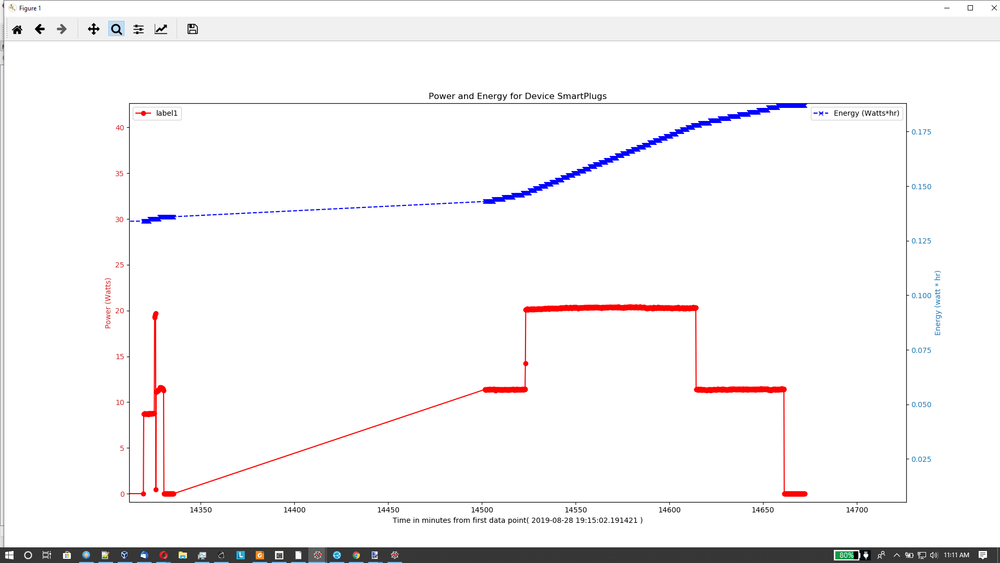
Sample of a graph
Graph Control
See also Graph GUI for other graph control, this is only for the controls on this window. Icons at the top left allow you to (hover over buttons for help):
- Zoom in on data
- Return to original display
- Scroll around the graph
- Adjust graph parameters
- Save image to a file
- Move forward and backward through views you have modified
